|
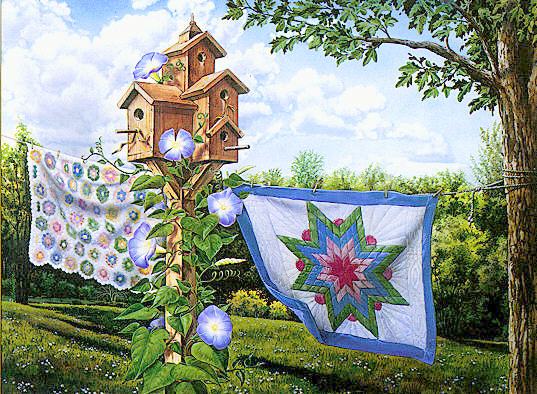
Team 1 Spring Challenge Springtime Memories
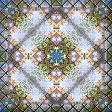
Right click to save above graphic. You will also need PSP, Simple Filters, FM Tile Tools Demo, Fantastic Machines Paint Engine, and the Two Moon Filter.
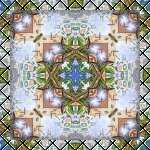
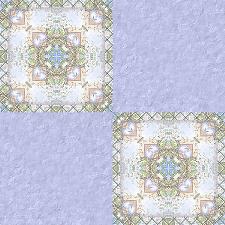
Open the image in PSP and Shift, D twice to duplicate. Close the original image and minimize one for now. With the remaining image active, Images, Resize, Pixel size 150 x 150 , Maintain Aspect Ratio Unchecked . Effects, Plug-ins, Simple Filters -- Top Left and Mirror, Simple Filters -- Pizza Slice, then Simple Filters -- Quick Tile. (Left tile shown below) Doubleclick on your selection tool, place 10 in Left and Top, 140 in Right and Bottom. Effects, 3D Effects, Cutout V & H -- 3, Opacity -- 50, Blur -- 8, Color -- #4B4C63. Repeat Cutout, changing V & H to -3. Selections, Invert. Effects, Plug-ins, Two Moon, Quilt -- Default Settings. (Right tile shown below) Save and minimize for now.
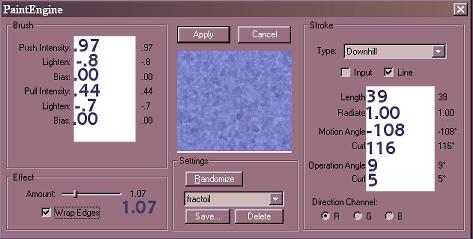
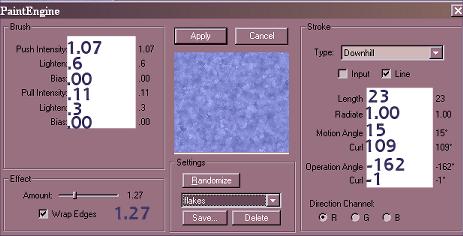
Open a New Image, 300 x 300, Transparent. Set your Foreground to Solid Color #9097DF and floodfill the image. Effects, Plug-ins, Fantastic Machines, Paint Engine, Fractoil, then repeat Paint Engine changing the setting to Flakes. If you do not have these settings, adjust your sliders to the numbers shown below and click save to name and save them in your Paint Engine Presets.
Now apply FM Tile Tools, Blend Emboss, Default settings, then Simple Filters, Quick Tile. Activate your Quilt image and Copy and Paste as a New Layer to your blue image. Move into place at the top left corner using the Zoom tool if needed. Layer, Duplicate; Image, Mirror, Image, Flip. Move into place in the lower right corner if needed. Add a layer, floodfill with #FFFFFF and lower the Opacity to 50. Layers, Merge All, Flatten. Images, Resize 75%, Maintain Aspect Ratio Checked. Name and save in .jpg format. Minimize for now.
Activate the duplicated image we minimized at the beginning. Add a layer, floodfill with #FFFFFF, then Effects, Plug-ins, Two Moon, Quilt -- Top number set on 45, Bottom number on 90. Take your Magic Wand tool, RGB Mode, 0 Feather and Tolerance and click on the white bkg. Selections, Modify, Select Similar, Delete. Selections, Invert. FM Tile Tools, Blend Emboss, Default Settings. Layers, Merge All, Flatten.
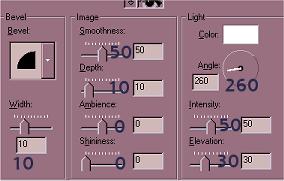
Set your background color to 9097DF, Images, Add Borders, 10, Symmetric. Select your border with the Magic Wand tool, then Effects, Plug-ins, Two Moon, Wish It Would Rain -- Line color -- 190, How many lines -- 40, Make it rain -- 255. Selections, Invert. Effects, 3D Effects, Inner Bevel as shown:
Change your background color to any dark color, Images, Add Borders, 25, Symmetric. Change your foreground Style to Patterns, select the Quilt image we made first and set the scale to 25%, angle -- 0. Floodfill the border. Selections, Invert. Apply Effects, 3D Effects, Cutout, same settings as earlier and repeat changing the V & H to -3.
Change your background color back to 9097DF. Images, Add Borders, 10, Symmetric. Effects, Plug-ins, Two Moon, Blade Reduction -- Default settings. Effects, 3D Effects, Inner Bevel, Pillow Preset. Selections, Select None. Image, Resize 75%, Maintain Aspect Ratio Checked. Effects, Sharpen, Unsharp Mask, Radius -- .50, Strength -- 1, Clipping -- 3. Repeat Resize and Unsharp Mask, same settings. Name and save in .jpg format.
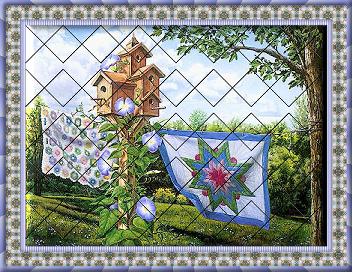
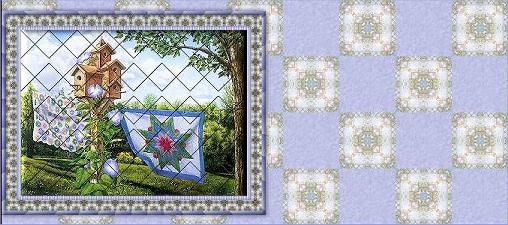
You can use the background image and the framed image in a left side scrolling script. To make a full panel nonscrolling or scrolling bkg. strip, open a New Image, 1024 x 300, Transparent. Set your Styles Pattern to the background image we made, scale set at 50%, angle -- 0. Floodfill with the pattern. Activate the framed image, Copy and Paste as a New Layer. Move into place on the left side. Effects, 3D Effects, Drop Shadow, V -- 2, H -- 0, Opacity -- 50, Blur -- 6.5, Color #4B4C63. Repeat, changing V & H to -2. Layers, Merge All, Flatten. Name and save.
We hope you enjoy this tutorial. It was very much a team effort with ideas from the Team Members mixed throughout the tutorial.
This tutorial is owned by Team Spirit Tutorials and the Team members who wrote it. Please do not copy or place this tutorial on any other site, email or e-list without written permission from Team Spirit Tutorials
|